Update
The guidance below refers to Microsoft Stream classic. For updated guidance about how to use the new version of Microsoft Stream to generate captions for your video files and then host them in Planest eStream, please see this page:
Guidance for Microsoft Stream classic
This method can be used with any Microsoft Stream video as long as it is narrated clearly.
First, navigate to the Microsoft Stream website using this link:
https://web.microsoftstream.com/
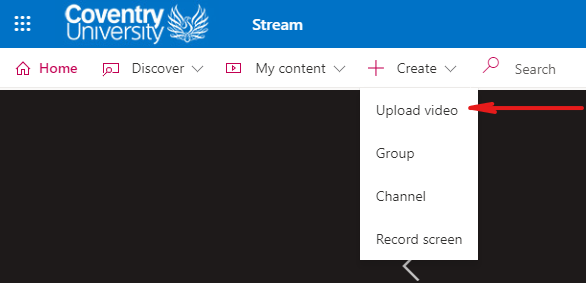
There will be a menu at the top of the page, hover over the button which says “Create” and then select “Upload video”
You will then be shown a box which looks like this one, then by clicking on “Options” you will find a checkbox for “Autogenerate captions”. This will autogenerate captions to attach to the video.

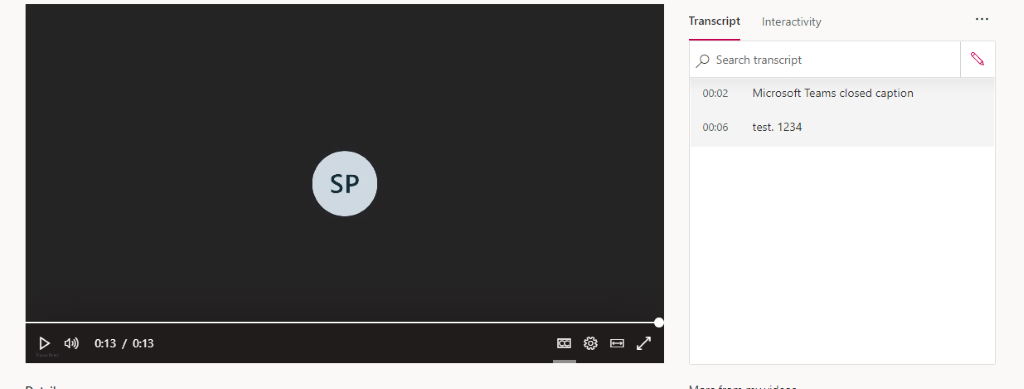
This caption can be changed and manually corrected after upload to fix any mistakes the program makes with transcribing your narration. The window to do this is to the right-hand side of your video. Simply click the pencil icon, make your desired changes, and then click the button again to save. You may need to refresh the page to see the changes you’ve made to the captions.