Transcripts make for a fantastic boost in accessibility of your meetings, especially for people who weren’t able to make it to the meeting or count on recordings/transcripts to fully understand what was discussed at the time. However, automatically-generated transcripts have their limits in terms of accuracy, so to make a truly accessibly record of the meeting, you can make some simple edits in the Zoom Web Portal.
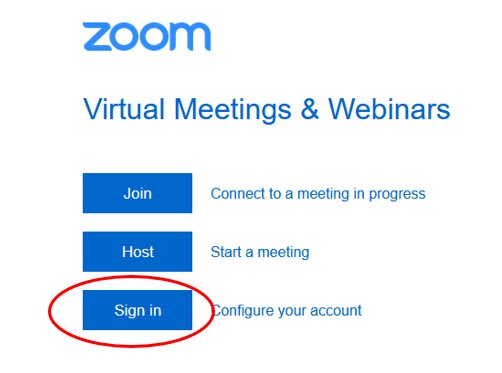
Signing into Zoom web portal
you have to go to the CUG ‘Sign into the Zoom’ web portal, here is a link to it below for your convenience,
https://coventry-ac-uk.zoom.us/
Press go and you will be taken to the following page, choose sign in and then use your usual CUG credentials:
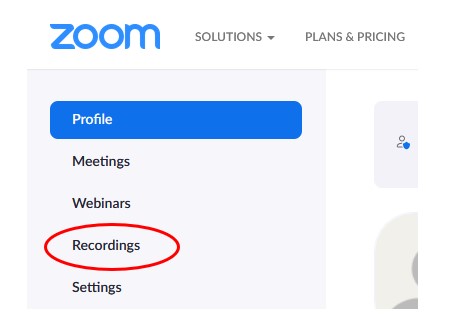
Locating recordings
In the navigation menu, click Recordings.
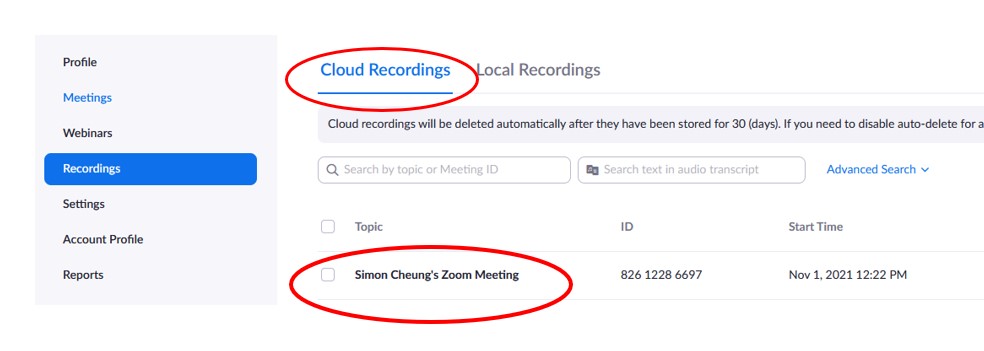
You will see a list of recording files, select ‘Cloud Recordings’ tab, and click the name of the recorded meeting.
Editing the transcript
Click the play icon, the text of the transcript displays on the right-hand side of the video.

Hover over a phrase you want to edit and click the pencil icon.

Then edit the text and click the tick to save
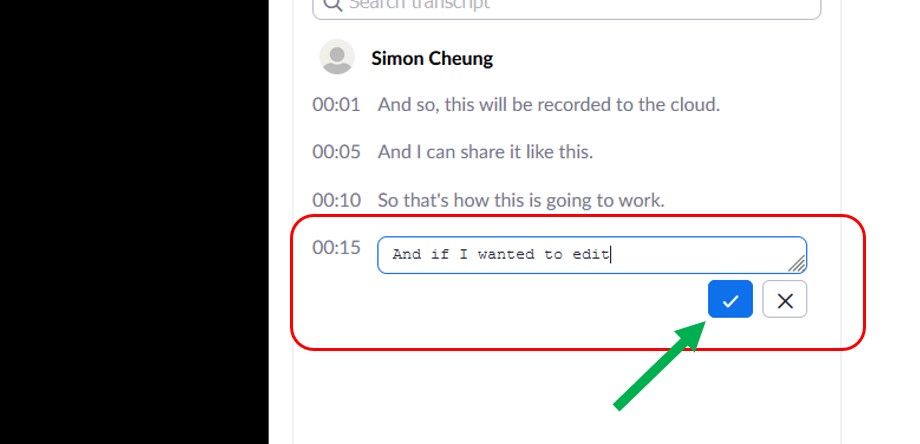
The updated version of the text is displayed when you play the audio or video file.
Further information
For more information, check the latest guidance from Zoom on their support page about audio transcriptions here: