Why is this important?
Automatically-generated captions do not meet user needs or accessibility requirements, unless they are confirmed to be fully accurate. They captions may need a significant amount of editing, depending on the conditions of the audio at the time of recording. There are tools that use speech recognition technology to turn a soundtrack into a timed caption file, however the automatic captions often contain inaccuracies which don’t match the spoken audio — sometimes in ways that change the meaning (or are embarrassing). For example, missing just one word such as “not” can make the captions contradict the actual audio content.
Uploading videos
This guidance page relates to videos which are already uploaded to CU Office365 Microsoft Stream, so if your video file isn’t there, you can upload it to there first.
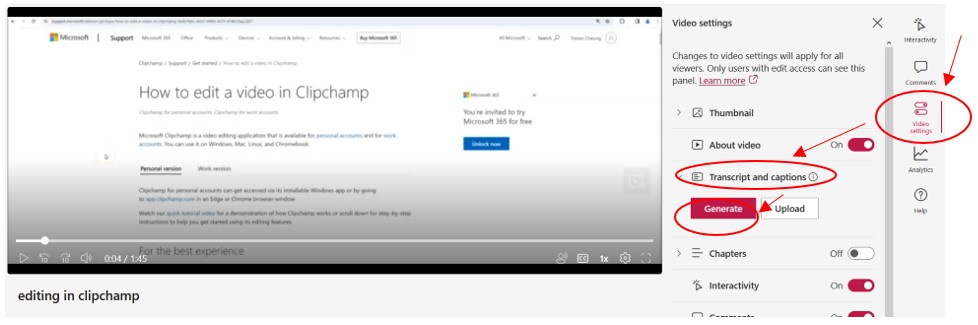
N.B. you may wish to add auto captions to your uploaded video – click video settings, transcript and captions, generate.
Editing your automated video captions
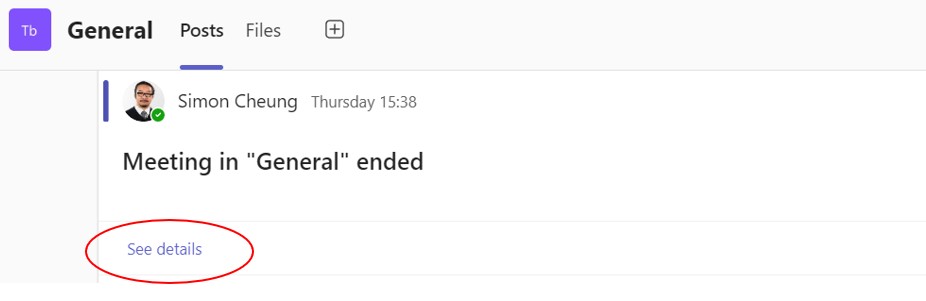
For Microsoft Teams meeting recordings, locate your recording in your meeting posts, click on See details
This will reveal the recording link
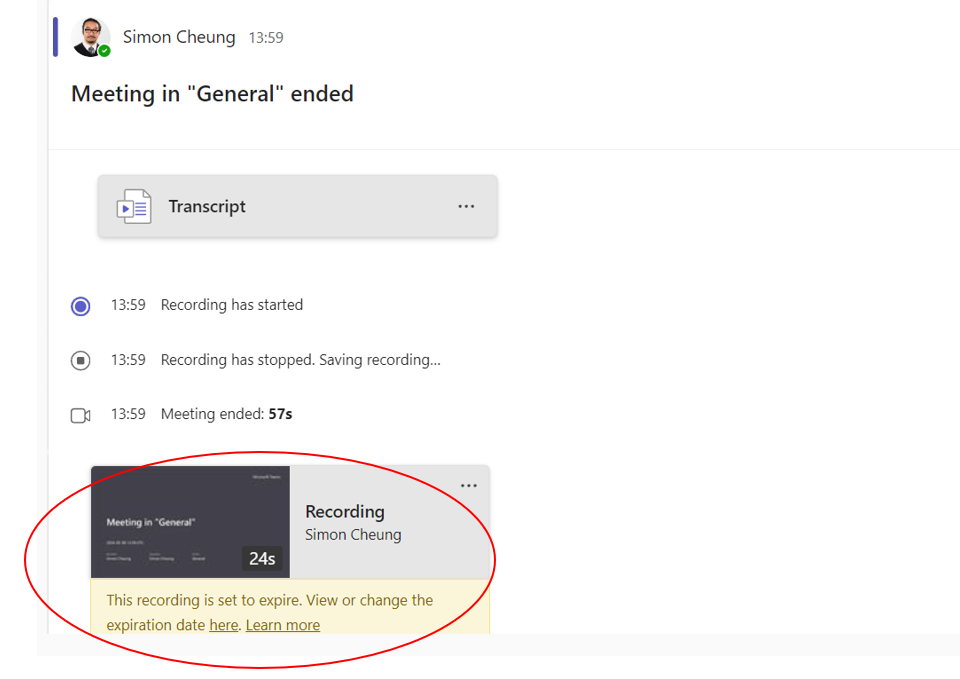
Click on the recording link to take you to the video in Microsoft Stream on Sharepoint
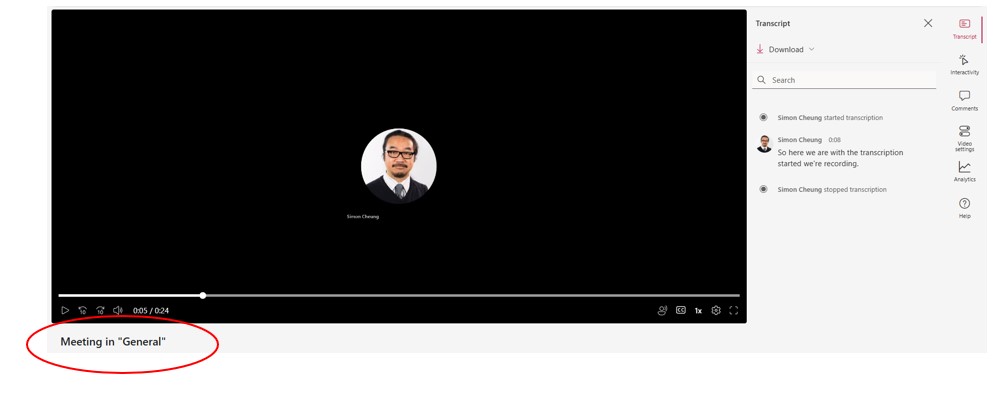
N.B. if the video does not show the transcript window on the right of the screen then click on the transcript icon
Mouse over the portion of the transcript you want to correct and select edit
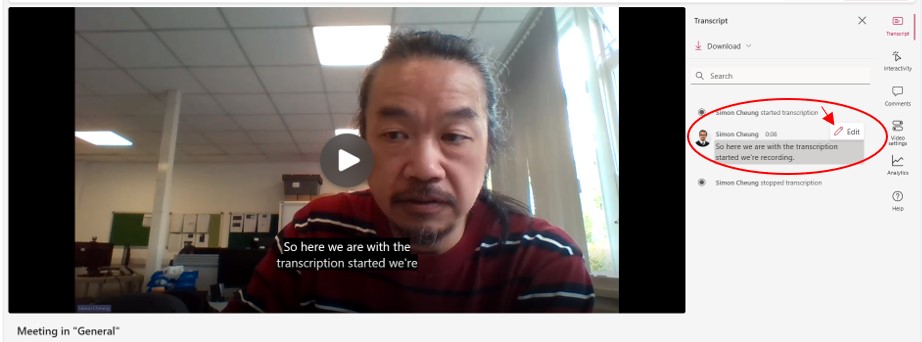
and make changes to the transcript text and click done to update this Teams meeting recording link

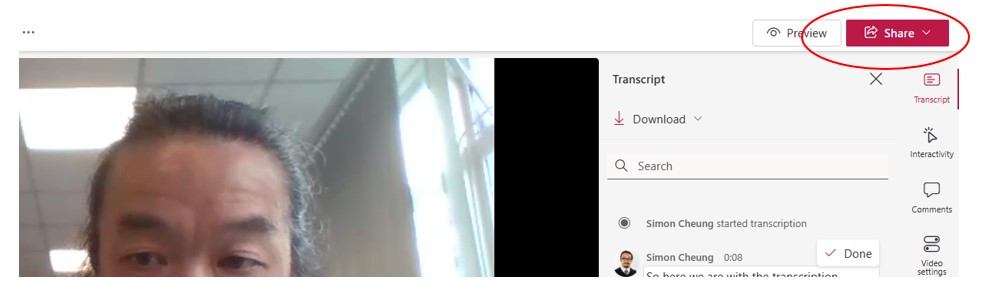
If you wish to have a separate link that you can copy and paste into Aula, click the share button
Further information
Microsoft detailed guidance on video transcripts and captions